Making our cooling case work with different mountings

If you have followed us for a while, you will know that we like to make our cooling cases adaptable to different options of mountings. It all starts with the universal AMPS 4 hole pattern. From there, it can work with some of these mount solutions:
- RAM ball mounts or Arkon mounts
- MyGoFlight adapters, so it integrates into the MGF mount system
- Quad Lock universal mount (with or without the hack) so it works with the Quad Lock mounting system.
One other mounting system that many people have asked if our cooling case could work with, is Pivot Case Mounts.
The Pivot Case Mounting plate
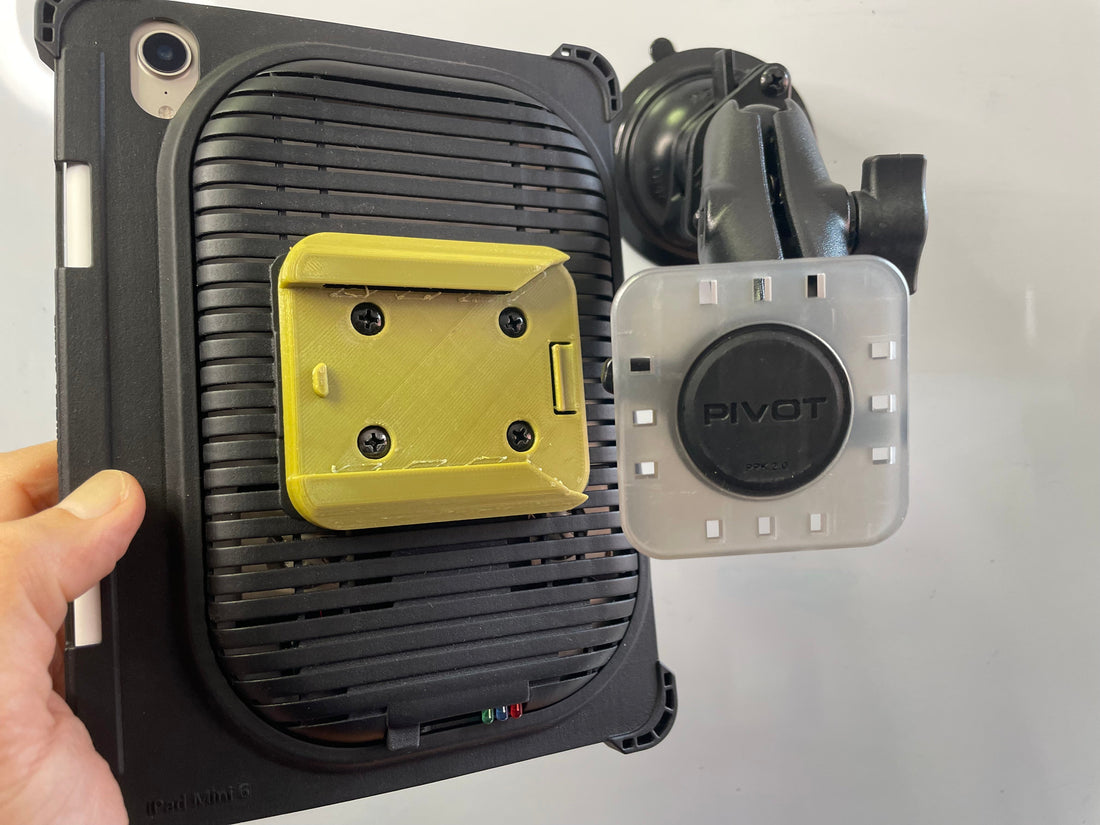
Pivot is a company that has been making iPad cases for pilots for about 10 years. They have a very unique mounting system where the iPad case is mounted by sliding a mounting plate into the back of the iPad case. A mounting channel is built in the back of the iPad case which allows the mounting plate to slide in and a clip secures the plate. Pressing that clip then releases the mounting plate. If you use a Pivot Case, then you would totally understand what I mean.

But because of this unique way of mounting, it is quite challenging to create an adapter for the mounting plate.
Making the adapter

Still, I took on the challenge. After a few iterations (i.e. design, 3D print, test, repeat), I came up with an adapter that does the job. Basically it has the AMPS 4 hole pattern so that it can be attached to the cooling case. It incorporates the mounting channel to allow the Mounting plate to slide in. Then, to secure the Mounting plate in place, instead of the clip that holds the Mounting plate, I designed a "spring" stopper that blocks the "exit". Pushing the stopper down will allow the Mounting plate to be "released".
Here's a video of how it all works:
Will we make this adapter?
[Updated - 2025 Aug 18]
No. This is purely experimental and I haven't tested it heaps. But if you are a hobbyist or maker and want to make this for your own use, I have now created a product page for it here (link), and you can download the STL file. There are instructions on the page about how to get it. There is a small fee for the download, primarily to cover maintenance costs and so that it can be listed on Google.
If you have any questions or thoughts, do leave us a comment or a note on our contact page. You can also subscribe (here) to our newsletter to get more content like this or be updated on new product releases and offers.


2 comments
Smart idea
Great work